This article is intended for informational purposes only and does not supersede or replace the official documentation provided by OpenText. It serves as supplementary guidance to assist with common challenges that may arise during installation and upgrades. For authoritative instructions and compliance requirements, refer to OpenText’s official documentation.
When upgrading or installing OpenText Vendor Invoice Management for SAP Solutions (SAP VIM), it is often necessary to activate so-called BC Sets (Business Configuration Sets). A BC Set (Business Configuration Set) in SAP is a tool that allows users to store, manage, and transport configuration settings efficiently. It acts as a template for predefined customizing settings that can be applied to an SAP system, ensuring consistency and reducing manual effort in system configuration.
Check all the available documentation before starting with the activation
Compiling a list of the necessary BC Sets and activating them in the correct order can be challenging, especially given the current state of the VIM documentation.
To ensure a smooth process, it is essential to not only refer to the Installation Guide but also carefully review the Configuration Guides and Release Notes. Also refer to the documentation for all service packs included in the upgrade, not only the latest one.
Never forget to export the table comparison
One of the most critical steps when performing an upgrade—especially in complex SAP environments—is to conduct a thorough comparison between the BC Set and the existing table contents before activation. This step ensures that no essential configurations are overwritten, lost, or modified unexpectedly, which could lead to system inconsistencies or functional disruptions.
During an upgrade, new BC Sets introduced by OpenText may contain updated settings that enhance functionalities or align with new system requirements. However, they may also overwrite existing custom configurations, potentially impacting workflows, document processing, or approval rules. A careful comparison allows you to identify discrepancies, retain necessary custom settings, and selectively adopt only the relevant changes.
To prevent accidental data loss, it is highly recommended to create a complete backup of the table contents before making any modifications. This backup acts as a safety net, allowing you to restore previous configurations if unexpected issues arise during or after the activation of new BC Sets.
Taking the time to perform this verification process not only safeguards critical system settings but also minimizes downtime and troubleshooting efforts in case of unintended changes. In the following section, we will go through the exact steps to compare BC Sets with table contents and securely back up configurations before proceeding with the upgrade.
Exporting the SCPR20 table comparison to .html (without cutting off important tables by mistake)
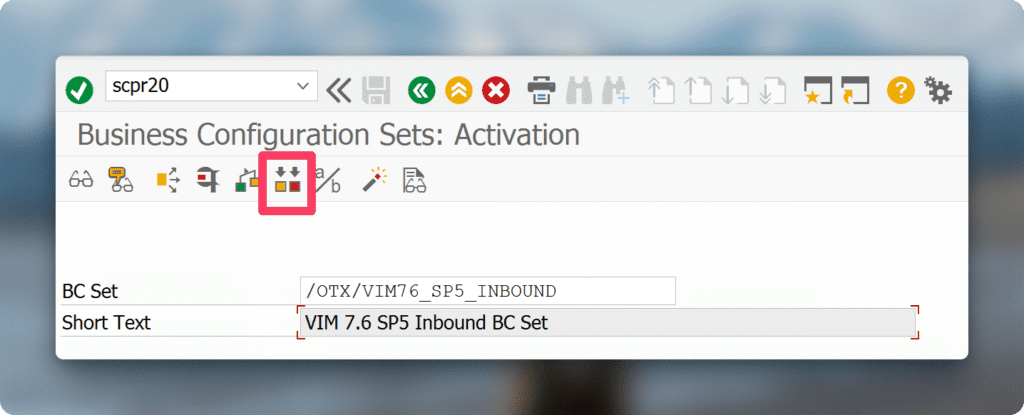
Entering the comparison in SCPR is easy by clicking on the button below:
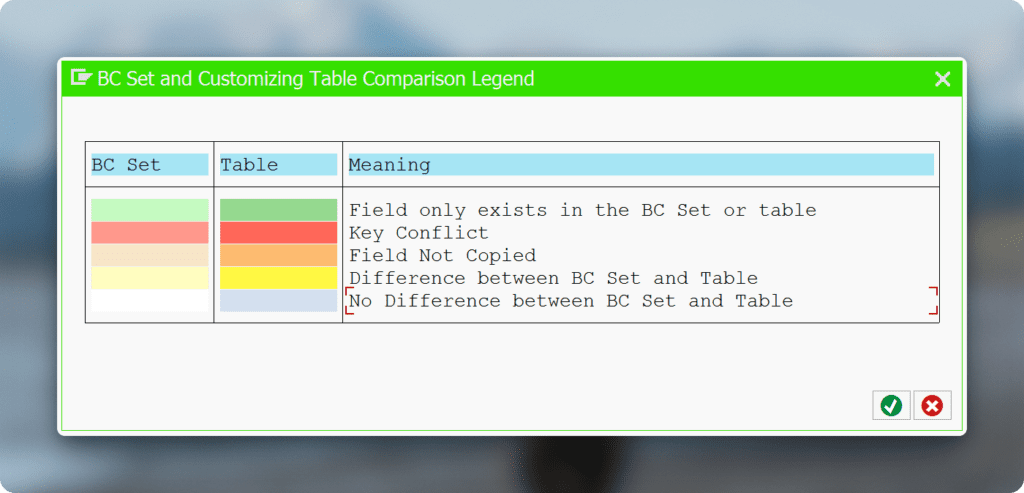
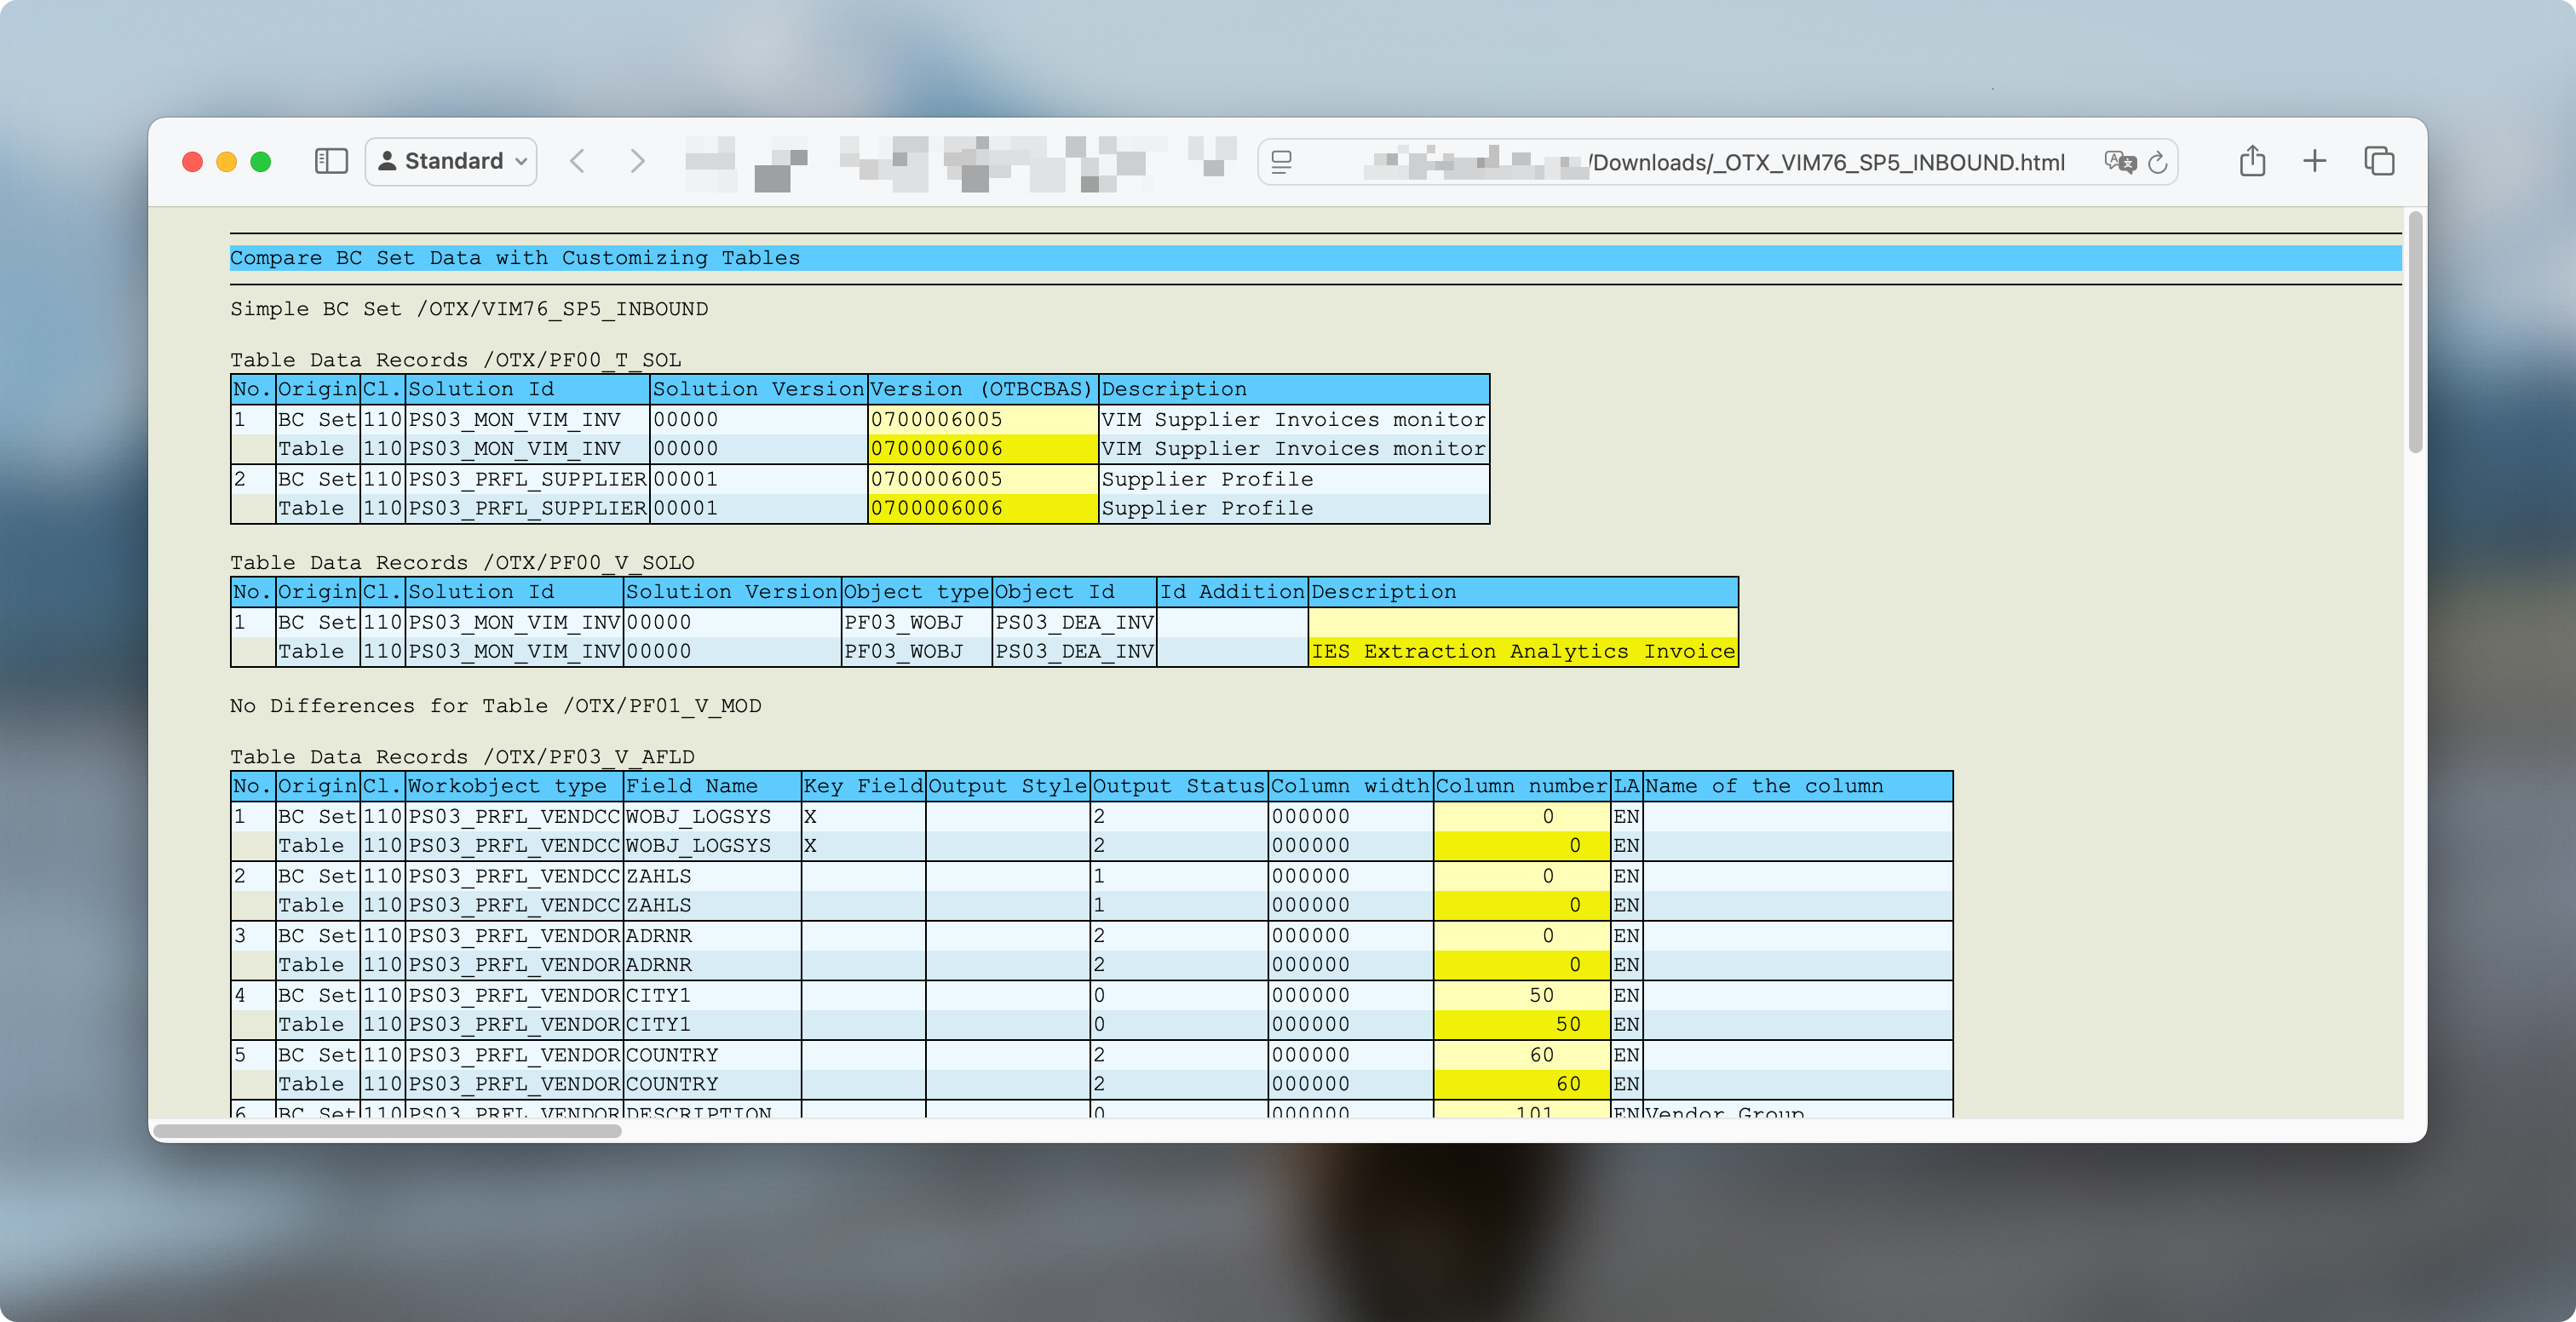
The displayed list usually shows you all the data which is different (yellow) or new (green).
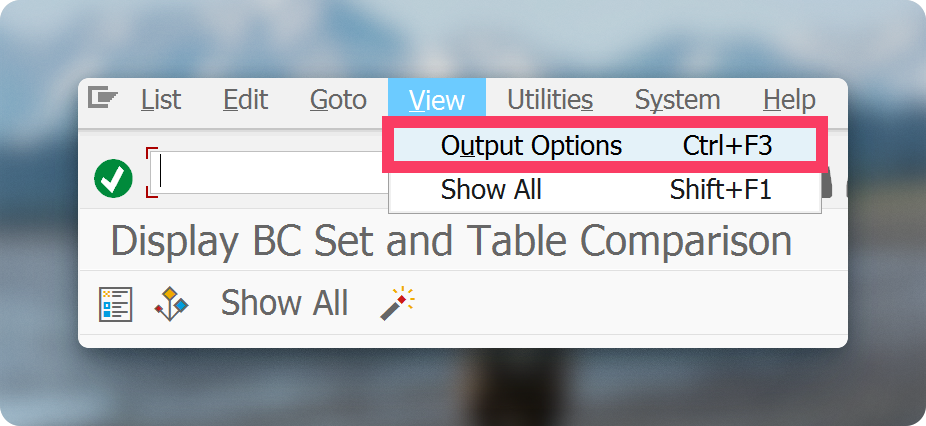
In general, the export of the table comparison is often forgotten. However, if the export is carried out, there is another pitfall that should not be overlooked, otherwise data may be lost. We have to go into the output options for this.
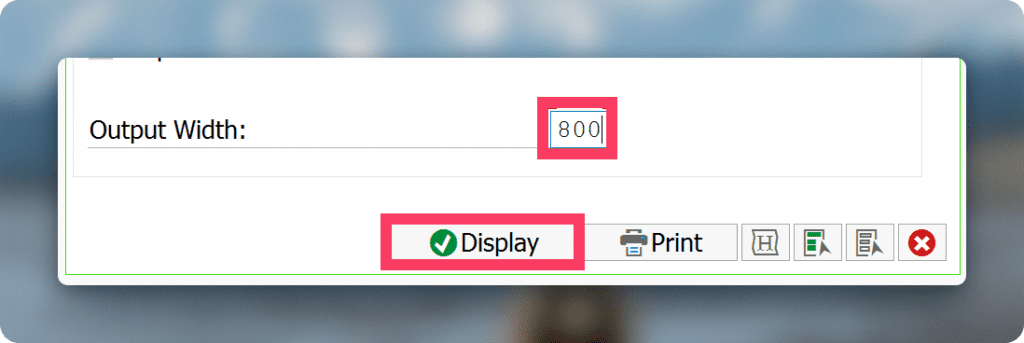
The output width is set to 150 by default, increase the number to 800. if tables, labels and content exceed 150 characters, they will otherwise be cut off and important information may be lost. Please also check whether 800 is sufficient here, I have not noticed any data loss in the exported files with this number. Do not change anything else in these settings.
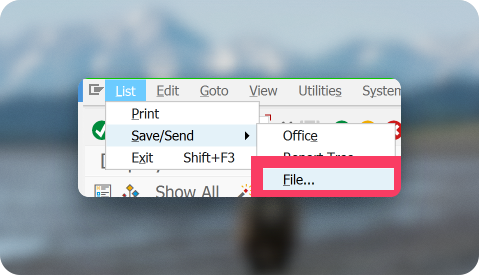
Now that we have prevented the file from being truncated, we can continue with the export. To do this, we go to List, Save/send and then to File.
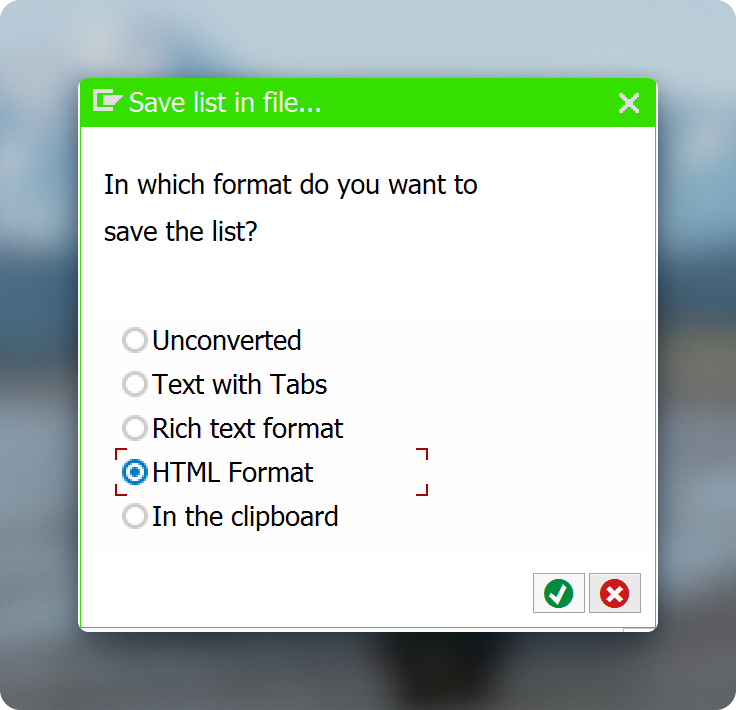
I prefer to save the comparison files as .html. This is small, clear and universally applicable. In addition, I don’t have to worry about Microsoft Excel versions and separators.
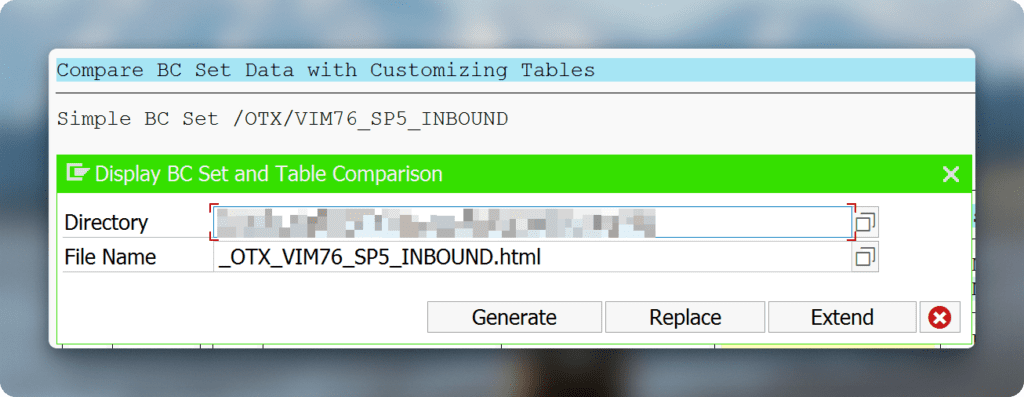
For the file name I recommend using the BC Set name with “/” replaced by “_”. Also creating a folder per service pack level does help to keep the overview. I also recommend to replace the suggested .htm with .html. At least on my computer this helps with directly opening in my browser on double click.
The export gives you a .html file which is lightweight and provides a very good overview. I recommend storing all the BC-Set comparisons together with your documentation. This is applicable for every single BC-Set in every service pack level.
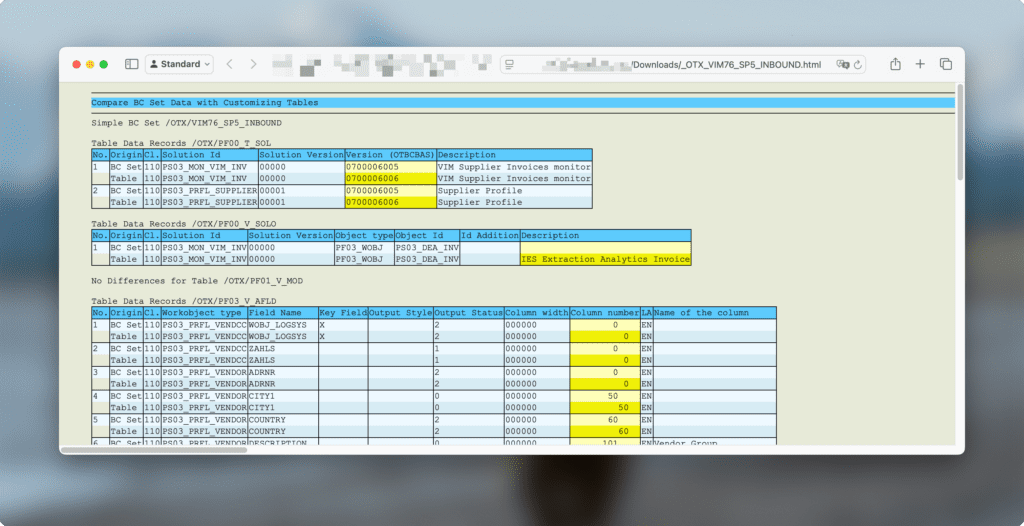
If you have paid very close attention, you will notice that in the screenshot above the BC sets of VIM 7.6 SP 5 are compared with the table contents of VIM 7.6 SP 6. This is of course not a realistic scenario and the BC sets should never be activated as shown in the comparison.
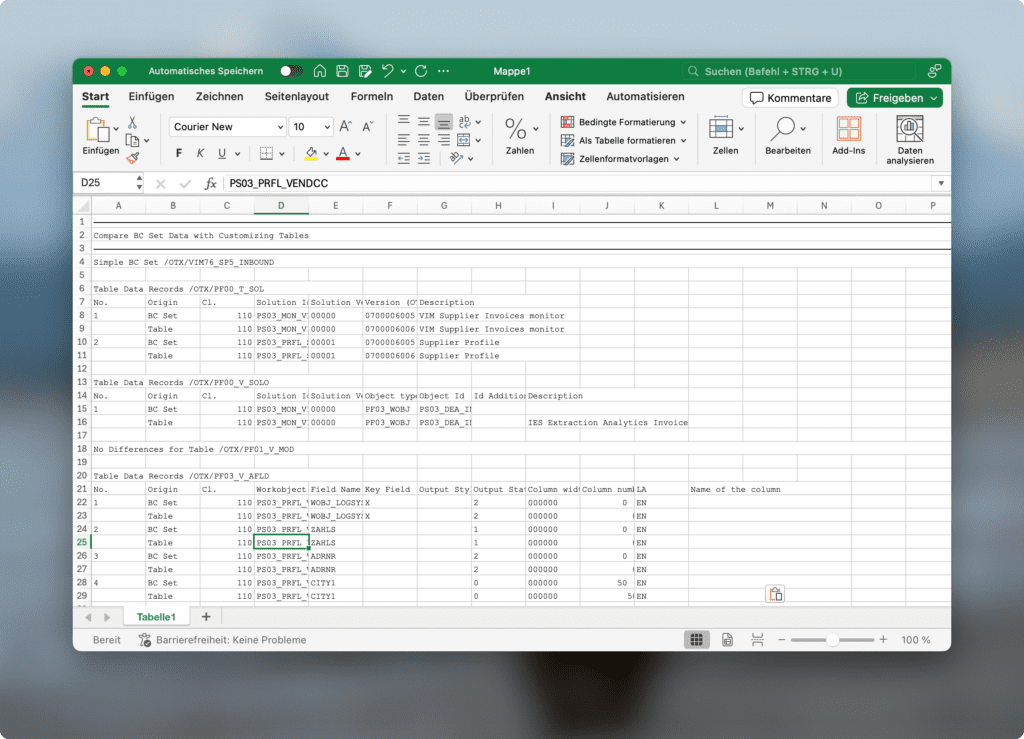
One of the main reasons I prefer using .html as an export format is that it allows for seamless copying and pasting into Excel while preserving the structure and formatting of the data. Unlike plain text or CSV files, which may require additional adjustments, HTML tables often retain proper column alignment, making the data immediately usable for further processing, analysis, or reporting in Excel. This method helps avoid common issues like misaligned columns, missing delimiters, or incorrect data types, ensuring a smooth workflow when handling exported information.
Conclusion
This may seem like a lot of effort, but failing to carefully verify BC Sets before activation can lead to serious issues. If a BC Set overwrites an important configuration, and you only realize it after deploying transport requests into the production system, it becomes extremely difficult to trace back what was changed and when. At that point, identifying the root cause of the issue can be time-consuming and complex, often requiring manual comparisons, system rollbacks, or troubleshooting unexpected system behavior. Taking the time to perform a thorough review and backup beforehand can save countless hours of debugging and help avoid disruptions in critical business processes.
With that in mind, I hope this guide helps make your VIM upgrade process smoother and more efficient. Wishing you great success with your upgrade.


Leave a Reply to Nilesh Dhole Cancel reply